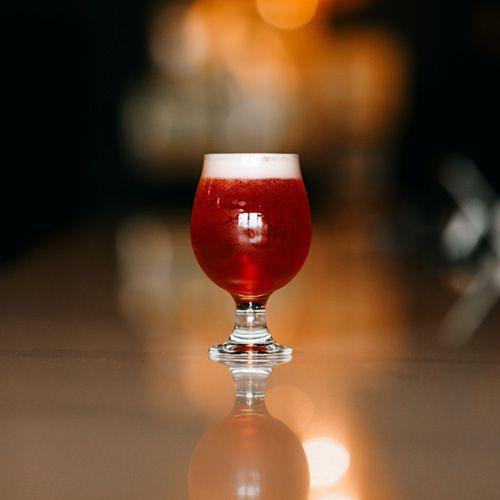
So, you have made your first delicious (hopefully!) home brewed beer. Maybe you used an extract kit. Perhaps you went with one of our super convenient and tasty Fresh Wort Kits. Maybe you jumped right into the deep end and dived into All Grain brewing right from the outset - and if so, I salute you, sir.
Either way, the wort and the yeast have done their thing. You probably watched with awe as the airlock went mad and the arcane, ancient chemistry (almost alchemy, in my opinion) of yeast and sugars did their thing.
You have a fermenter filled with beer.
So, now what?
Well, it’s time to bottle.
There are, broadly speaking, two main scenarios when it comes to bottling beer. The first, and most common method when getting in started, is using gravity to transfer into bottles using a bottle wand or similar. Our newly re-designed Flat Bottom Fermzilla Kit is a fantastic introductory kit – it's a great entry point into the world of homebrew.
The second technique is a pressure transfer. This is more common when kegging, but it is quite common for avid brewers to wish to put a few brews into bottles even if they are kegging. For pressure fermentation and transfer, the Fermzilla All Rounder is quite simply the smartest design and the very best value in home brew.
The first steps are the same – you need to get those bottles cleaned, sanitised and primed.
Step 1: Cleaning and Sanitising Bottles
There are a huge variety of bottles suitable for homebrew. PET and glass. Crown Cap, Screw top and Grolsch style swing top. The type and size of bottle makes no real difference, provided that they are brown. You want bottles that will block UV light that can cause all sort of issues especially skunking.
You can find 500ml PET bottles here, or glass swing top bottle here.
Now you need some cleaner and sanitiser. StellarClean PBW and and a no rinse sanitiser such as StellarSan are pretty much industry standards. It is great practice to rinse your homebrew bottles straight after use, as no doing so will make the cleaning procedure much harder. For first use though, some hot PBW and a quick swish with a bottle brush should be all that is required.
To sanitise, we strongly recommend using a Bottle Washer and Bottle Tree. These will save you a lot of time and are well worth the effort. Remember, StellarSan is a no rinse sanitiser. If you have never used it before, remember DO NOT FEAR THE FOAM. It is harmless and tasteless. Bottle away.
Remember to sanitise your crown seals or caps as well – just chuck them in the Bottle Washer when you are done with the bottles.
Step 2: Priming Sugar
When bottling beer, the carbonation comes from a secondary fermentation that occurs in the bottle. There will be more than enough viable yeast cells in the beer for this, so we just need to add the right amount of sugar to achieve the levels or carbonation required.
There are two ways to achieve this. You can use a priming sugar calculator such as this one, and carefully measure out the recommended amount into your beer. This will need to be carefully mixed to ensure an even distribution. Many brewers use a secondary bottling bucket for this – they would rack the beer from primary onto the bottling sugar into a secondary bottling bucket. Personally, I don’t recommend this as it leads to a pretty decent chance of oxidising your beer, which we want to avoid as much as possible at this stage.
If you take this approach, use a siphon and be as careful as possible to minimise splashing etc when transferring.
Another approach is to add priming sugar directly to the bottles. The easiest way to to this is to use carbonation drops, which will fit straight into the bottle. The disadvantage is that the dose cannot be easily modified, being standardised for 330-375ml and 750ml bottles, but that isn’t that big of an issue. One drop for small bottles, two drops for 750ml bottles.
Step 3: Let’s bottle this sucker! (Bottling from a fermenter with a tap).
We have our finished beer. We have cleaned and sanitised bottles. Ideally, we have some leftover sanitiser and maybe a spray bottle of Super Kill Ethanol Sanitiser for quick fixes.
If you have a Fermzilla Flat Bottom or similar, so a non pressure capable fermenter with a tap at the bottom of the tank, then this is the easiest method to follow.
A really handy tip is to place your fermenter on the kitchen counter directly over the open dishwasher. Any drips will land on the door of the dishwasher and make clean up a lot easier.
Now, ensure your Bottling Wand is clean and sanitised. I use a jug of StellarSan left over from sanitising the bottles for this. Spray the inside of the fermenter tap with Super Kill and insert the bottling wand into the tap.
Make sure your Benchtop Capper is on hand and adjusted to the correct height.
Now is the time to work quickly. Having a second pair of hands is actually super helpful when it is time to bottle.
Firstly, remove the airlock from the fermenter. Double check that you have added your priming sugar to either the bottle or the fermenter – please do this, as it is surprisingly easy to forget and ruin an entire batch of beer.
Take your first bottle and raise it up to the bottling wand so that the spring of the wand pushes against the bottom of the bottle. The design of the wand is such that the bottle will fill from the bottom, minimising the risk of oxidation.
FILL UNTIL BEER OR FOAM JUST ESCAPES FROM THE NECK OF THE BOTTLE.
Once the bottling wand is removed, this will leave exactly the right amount of headspace.
You can now cap the bottle and move onto the next – having that second person to assist means one can cap and one can fill, which makes the operation a fair amount smoother. Some brewers just put the caps on the bottles and seal them when they are all filled, but I am a big advocate for capping as you go. Your call.
Repeat this process until you have no more beer left. Don’t forget to pull off a sample for your hydrometer so you can take a final gravity reading.
Make sure you drink this sample, too – that's a homebrew tradition that must be followed!
That’s it. You’re done. You have bottled your first batch of beer. Congratulations. Reward yourself with a delicious beverage. Then go clean up.
Bottling Under Pressure
The second method applies if you have a pressure capable fermenter such as a 30L All Rounder without a tap. These typically draw the beer from the top, using a floating dip tube. That, coupled with the ability to seal and purge the tank are two of the big advantages of a pressure capable fermenter. They are however more geared towards kegging than bottling.
To bottle easily from a pressure capable fermenter, you will need a bit more gear. If you already keg then you will have most of this anyway. If not, then give it a good hard look – once you switch to kegging you will never go back.
You will need a CO2 cylinder and regulator, beer line and a Bottle Filler Beer Gun, plus the accompanying disconnects and line.
Hook up the CO2 to the fermenter at around 2-4psi. If you can split the gas line, you can hook up the gas inlet on the on the bottle filler beer gun as well. It has a separate trigger mechanism that allows you to purge the bottle with CO2 before filling, which we recommend to minimise O2 uptake and potentially prolong the shelf life of your beer.
Don’t forget to sanitise your bottle filler! You can immerse the whole unit in StellarSan. It’s not a bad idea to have a PET bottle with a carb cap that is filled with StellarSan. This enables you to easily run some sanitiser through the beer gun before you begin.
Once this is done, you are good to go! Put the tip of the beer gun into the bottle, purge with CO2 and pour away. As with bottling from the tap, fill the bottle until beer or foam just escapes, then cap.
A couple of tips – always open and close the beer valve quickly to help prevent foaming.
It is helpful if the beer is cold, although this is primarily a concern if it is fully or partially carbonated (if fermenting under pressure, for example).
Be careful to not exceed 15psi – although you should be quite a bit below this in any case.
Everything else is the same as filling from the fermenter tap, so bottle away!
Hopefully this helps explain things if you are brand new to the exciting world of home brew. If you have any questions or just need some advice, our team is always more than willing to help. Email us at beer@kegland.com.au or call during business hours.
As ever, happy brewing!


